
Welcome to the dynamic world of basketball drawing, where action and precision meet on the canvas. If you’re passionate about basketball and art, this guide is tailored for you. Drawing basketball scenes involves more than capturing the ball and players; it’s about conveying the intense energy and movement of the game. This article will walk you through the essentials of basketball art, from sketching basic shapes to adding dramatic textures and colors. By mastering these skills, you’ll not only enhance your drawing techniques but also gain the ability to portray the thrilling moments of basketball in your artwork. Read on to discover how you can bring these energetic scenes to life with your creativity and artistic flair.
Essential Tools and Materials for Basketball Art
Creating captivating basketball drawings starts with selecting the right tools and materials. Here’s a guide to what you’ll need to bring your artistic visions to life:
Drawing Tools
- Pencils: A range of graphite pencils from hard (H grades) to soft (B grades) is indispensable. Hard pencils help create fine lines for detailed work, while soft pencils are ideal for dark, rich shadows and dynamic effects.
- Erasers: Invest in both kneaded and plastic erasers. Kneaded erasers are perfect for lightening pencil strokes and creating highlights, whereas plastic erasers remove graphite cleanly for major corrections.
- Inking Pens: For those who want to define their drawings with clean, bold lines, fine liner pens or brush pens are essential. They offer precision and vary in thickness to enhance the dynamism of your artwork.
Materials
- Paper: Smooth, high-quality drawing paper is crucial for detailed work, especially if you plan to use inking pens. Thicker paper or cardstock can handle multiple revisions without tearing.
- Blending Stumps and Tortillons: These tools are used for smudging and blending graphite, helping to create smooth transitions between light and shadow, which adds realism to your drawings.
Additional Tools
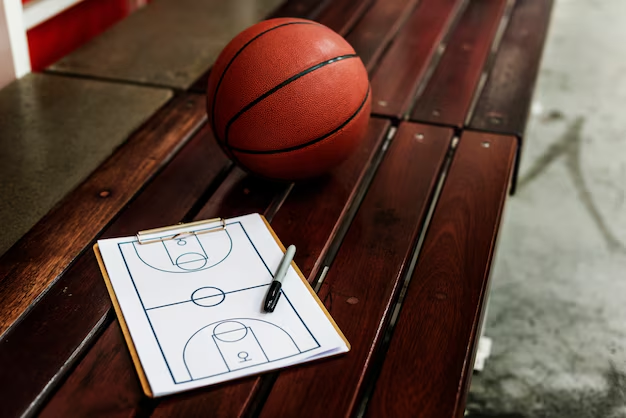
- Rulers and Geometry Sets: Useful for drawing straight lines and perfect circles. These tools aid in getting the proportions right, especially when sketching the basketball court and equipment.
- Fixative Spray: A good quality fixative spray will protect your finished drawings from smudging and dust, preserving your work in its best form.
Preparing Your Workspace
- Adequate Lighting: Ensure your drawing area is well-lit with natural or artificial light to avoid eye strain and to see your work clearly.
- Organized Space: Keep your workspace tidy and your tools within easy reach. This organization helps maintain focus and efficiency while drawing.
By gathering these tools and preparing your space effectively, you set the stage for successful and enjoyable drawing sessions. With everything at your fingertips, you’re ready to start capturing the energy and excitement of basketball on paper.
Fundamentals of Basketball Drawing
Mastering the fundamentals of basketball drawing sets the foundation for creating dynamic and realistic artwork. This section breaks down the essential steps and techniques required to start drawing basketball themes effectively.
Basic Shapes and Proportions
- Initial Shapes: Start by sketching the basic shapes that make up the basketball and players. For the basketball, begin with a perfect circle. Use light strokes to adjust easily if needed.
- Proportions: Understanding the proportions of basketball players is critical. Human figures in action require a balance between realistic anatomy and dynamic exaggeration to convey movement.
Sketching Basic Forms
- Adding Details: Once the basic shapes are in place, add more details. For players, this includes muscles, jerseys, and expressions that reflect the intensity of the game.
- Refining Lines: Clean up your initial sketches by refining the lines. This step involves solidifying the form of the basketball and enhancing the clarity of player figures.
Enhancing with Details and Textures
- Basketball Lines: The distinct lines on a basketball should be drawn accurately to maintain its iconic look. These lines help the viewer recognize the form as a basketball even in dynamic poses.
- Player Details: Details like the texture of the jersey, the grip on the shoes, and sweat can add realism. Pay attention to these finer aspects to bring your characters to life.
Techniques for Realism
- Shading and Texturing: Proper shading underlines the volume of the objects and figures. Observe where the light falls and the shadows form, and apply shading accordingly to provide depth.
- Highlighting and Enhancing Shadows: Use highlights to represent reflective surfaces and sweat on players. Enhancing shadows can give your drawing a dramatic effect, especially under the intense lighting of a basketball arena.
By focusing on these fundamental aspects, artists can develop a solid groundwork for their basketball drawings. Whether capturing a quiet moment or a high-energy play, these skills are indispensable for creating impactful and realistic basketball art.
Techniques for Capturing Motion and Emotion
Capturing the dynamic movement and intense emotions of basketball players is a challenging yet rewarding aspect of sports illustration. Here’s how artists can effectively depict motion and convey the emotional highs of the game in their drawings.
Depicting Dynamic Movements
- Study of Motion: Observing real basketball games or studying slow-motion videos can help artists understand the mechanics of movement. Note how muscles flex and extend during jumps, sprints, and pivots.
- Exaggeration for Impact: Slightly exaggerating the motion can emphasize the action. This technique, often used in animation, enhances the feeling of speed and force in static images.
Conveying Intensity through Facial Expressions
- Facial Details: Players’ expressions during a game can tell a story of struggle, triumph, or concentration. Capturing these expressions adds a layer of depth to your artwork.
- Eyes and Mouth: The eyes and mouth are particularly expressive features. Widened eyes or gritted teeth can effectively communicate a player’s intensity and focus.
Advanced Drawing Techniques
- Line Weight Variation: Changing the thickness of your lines can imply depth, with thicker lines for closer objects and thinner lines for distant ones. This technique also helps in emphasizing movement.
- Speed Lines: Adding speed lines in the background or around the players can illustrate swift movements, making static images appear in motion.
Using Colors and Shadows to Enhance Realism
- Selective Coloring: Using a limited color palette for the players and a more vibrant palette for the background can draw the viewer’s focus to the action.
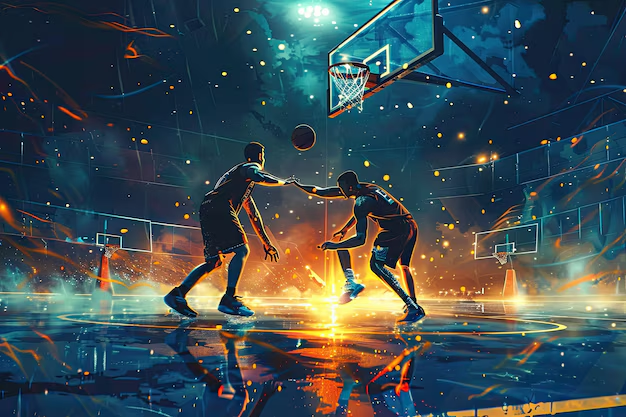
- Dynamic Lighting and Shadows: Intense and contrasting lighting can dramatize the scene. Shadows cast by players can add to the realism and provide a sense of the time of day and setting.
By mastering these techniques, artists can create powerful representations of basketball that are not only visually compelling but also emotionally resonant, bringing the thrill of the game to life on paper.
Advanced Drawing Techniques for Basketball Art
To elevate your basketball drawings from simple sketches to sophisticated artworks, advanced techniques are essential. These methods will help you render more detailed and realistic illustrations, capturing the energy and atmosphere of basketball.
Shading Techniques for Depth and Volume
- Cross-Hatching: Use cross-hatching for textured shading that adds depth to player uniforms and the basketball. This method involves drawing intersecting sets of parallel lines that vary in density and angle.
- Smooth Gradients: For smoother transitions, especially in skin tones and the basketball court, use blending tools like stumps or your fingers to smooth out the pencil shades, creating a gradient effect.
Texturing for Realism
- Creating Fabric Textures: Pay attention to the way fabric folds and stretches on players’ jerseys. Use fine lines to mimic these textures, adding realism to your drawings.
- Leather Texture of the Ball: For the basketball, subtle stippling can create the textured look of the leather, making the ball appear more lifelike.
Color Application Techniques
- Layering Colors: Build up colors in layers to achieve depth, starting with lighter shades and gradually adding darker tones. This technique is particularly effective for dynamic scenes where lighting plays a significant role.
- Using Color to Convey Mood: Choose your color palette to reflect the intensity and mood of the basketball game. Warm colors can enhance the action’s energy, while cool colors might be used for more subdued scenes or backgrounds.
Lighting and Shadow for Dramatic Effect
- Directional Lighting: Consider the source of light in your scene. Directional lighting can cast dramatic shadows, emphasizing the muscular definition of players and creating a focal point on the court.
- Highlight and Shadow Contrast: High contrast between light and dark areas can make your drawings pop. Use sharp contrasts to focus on key action areas, like a player making a slam dunk.
Incorporating Digital Tools
- Digital Enhancements: Use digital tools for fine adjustments or to add effects that are difficult to achieve manually. Software can help adjust the contrast, saturation, and sharpness to bring your scenes to life.
- Texture Brushes: Digital brushes can mimic real-world textures, such as leather or fabric, allowing for a more detailed and varied surface appearance in your drawings.
By integrating these advanced techniques, your basketball drawings will not only capture the action accurately but also convey the excitement and drama of the game. This approach allows artists to produce works that resonate with viewers, providing a deeper appreciation of both the sport and the art.
Creating Dynamic Basketball Scenes
Capturing the essence of a basketball game in art requires a keen eye for detail and a skillful hand to create dynamic scenes that depict the movement and excitement of the sport. Here are steps and considerations for artists looking to bring basketball games to life through their drawings.
Designing Action-Packed Poses
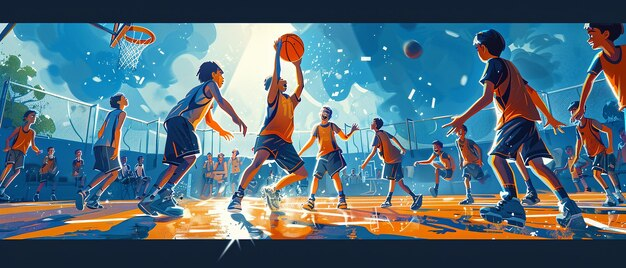
- Dynamic Poses: Focus on the action of the game. Players jumping, running, and shooting are great subjects. Study the anatomy in motion to accurately portray the energy and physicality of the sport.
- Interaction Between Players: Include multiple players to show interaction, such as defensive plays and team strategies. This adds a layer of complexity and realism to your scenes.
Integrating Backgrounds and Courts
- Court Details: Draw the basketball court with accurate markings, which grounds your scenes in a recognizable setting. The court lines can lead the viewer’s eye towards the main action.
- Crowd and Environment: Adding spectators in the background can enhance the atmosphere, giving the scene a lively and energetic feel. Be mindful of the scale and perspective to maintain focus on the players.
Developing Stories Through Your Drawings
- Narrative Elements: Each drawing should tell a part of the story of the game. Whether it’s a critical moment or a routine play, consider what the scene conveys about the game’s progress.
- Facial Expressions and Body Language: Use facial expressions and body language to show tension, excitement, or disappointment. These emotional cues can make your drawings more engaging and relatable.
Selecting the Right Composition
- Focal Points: Decide what the main focus of your drawing will be. Positioning the main action or player in a way that naturally attracts the eye can make your compositions more effective.
- Use of Space: Balance the composition by considering the placement of players, the ball, and other elements. Negative space can be used strategically to highlight or isolate key moments.
Enhancing Your Scenes with Textural Details
- Texture and Detail in Uniforms and Equipment: Add textures to the players’ uniforms and the basketball to give a more tactile sense of realism. Details like sweat, wrinkles in the fabric, and reflections on polished floors can significantly enhance the visual impact.
- Shadows and Lighting: Accurate shadows and lighting not only add depth but also help in creating the time of day and the intensity of the indoor arena lighting, which are critical in basketball settings.
By focusing on these elements, artists can create vibrant and realistic basketball scenes that capture the spirit of the game and draw viewers into the action. This approach allows for a more immersive experience and showcases the artist’s ability to depict intense, fast-paced sports activities.
Narrative and Storytelling in Basketball Art
Developing a narrative within your basketball drawings can transform a static image into a story that unfolds on the canvas. Here’s how to weave storytelling elements into your artwork to make each piece a narrative journey.
Developing Stories Through Visual Elements
- Sequential Art: Consider creating a series of drawings that tell a story over time, much like a comic strip. This could depict key moments leading up to a crucial play or capture the aftermath of a game-winning shot.
- Player Interactions: Show players communicating, strategizing during a timeout, or reacting to a play. These interactions add a layer of depth to the personalities portrayed and enhance the story.
Conveying Emotion and Drama
- Emotional Impact: Use close-ups of players’ faces to capture intense emotions. The strain, determination, or joy of a player can connect the audience emotionally to the artwork.
- Conflict and Resolution: Illustrate the conflict of a tightly contested game and resolve it with a pivotal moment, such as a last-second shot or a decisive defensive play. This builds tension and payoff in your narrative.
Leveraging Backgrounds for Context
- Setting the Scene: Background elements can set the time and place, such as a packed arena for a championship game or a rundown court for a streetball scene. These details provide context to the narrative.
- Environmental Interaction: Show how the environment interacts with the players. For instance, a player might kick up dust on an outdoor court, or sweat might reflect the arena’s bright lights, adding realism and atmosphere.
Visual Storytelling Techniques
- Perspective and Angle: Use unusual angles and perspectives to make the narrative more dynamic. A bird’s-eye view of a play can give a comprehensive look at the game setup, while a ground-level shot might emphasize the speed and height of the players.
- Symbolism and Metaphors: Introduce elements that symbolize broader themes, like a broken net to signify defeat or a spotlight on a player in a key moment to highlight pressure.
Integrating the Audience
- Crowd Reactions: Include the crowd’s reactions to reflect the game’s stakes. Cheering fans, anxious coaches, and stunned opponents can mirror and amplify the main action.
- Interactive Elements: If your art will be displayed online or in interactive media, consider elements that allow viewers to explore different parts of the story, such as alternative outcomes or backstories of players.
By embedding these storytelling techniques in your basketball art, you can elevate your work from mere depiction to compelling narratives that capture the spirit and drama of basketball, engaging your audience on a deeper level.
Showcasing and Sharing Your Work
Once you’ve created a powerful basketball drawing, sharing it with a wider audience is the next step. Here’s how to effectively showcase your art and build a portfolio that resonates with viewers.
Utilizing Social Media Platforms
- Instagram and Pinterest: These visual platforms are perfect for sharing your artwork. Use hashtags related to art and basketball to reach a broader audience. Engaging captions can provide context or a backstory to your drawings, encouraging interaction.
- Art Communities: Join online communities such as DeviantArt or ArtStation where artists gather to share their work, receive feedback, and connect with others. These platforms can also provide inspiration and exposure to new techniques.
Building a Professional Portfolio
- Selecting Your Best Work: Curate a selection of your strongest pieces that showcase your skills and range. Focus on variety in composition, emotion, and technique to demonstrate versatility.
- Organizing the Portfolio: Arrange your portfolio in a way that tells a story or highlights your progression as an artist. This could be chronological, thematic, or by technical complexity.
Engaging with the Audience
- Artist Statements: Writing brief artist statements for each piece can help viewers understand your intent, the story behind the work, and your creative process. This adds a personal touch and invites the audience to connect with your art on a deeper level.
- Interactive Features: On your website or online portfolio, include features that allow viewers to leave comments or ask questions. Interaction can lead to more meaningful connections with your audience.
Showcasing Your Work Offline
- Art Exhibitions and Galleries: Participating in local or online art exhibitions can give your work more visibility. These events often attract art lovers and collectors who appreciate original art.
- Printed Portfolios and Business Cards: When attending exhibitions or meeting potential clients, having a printed portfolio and professional business cards can make a lasting impression.
Collaborating with Other Artists
- Joint Projects: Collaborate with other artists to create themed series or exhibitions. Working with others can introduce you to new techniques and audiences.
- Art Challenges: Participate in art challenges or competitions. These events often lead to increased exposure and can push you to explore new creative avenues.
Marketing Your Art
- Commission Work: Offer custom drawings or illustrations for clients. This can be a way to monetize your skills while building a client base.
- Merchandise and Prints: Consider selling prints, posters, or merchandise featuring your basketball art. Platforms like Redbubble or Society6 allow artists to sell their work with minimal overhead.
By effectively showcasing and sharing your basketball drawings, you can build a following, gain recognition, and even generate income from your art. The key is to remain consistent, engage with your audience, and continuously look for opportunities to grow your presence in the art community.
Common Challenges and Solutions in Basketball Drawing
Creating detailed and dynamic basketball drawings comes with its own set of challenges. Recognizing these challenges and understanding how to overcome them can help artists improve their work and achieve better results.
Challenge 1: Capturing Movement
- Problem: Accurately depicting the fast-paced action of basketball can be difficult. Movement may appear stiff or unnatural if not executed properly.
- Solution: Study and practice gesture drawing. Gesture drawing focuses on capturing the action and flow of the body in motion. Short, quick sketches from live-action videos or photos can help you understand how the body moves dynamically. Over time, this practice will lead to more fluid and lifelike representations of motion in your work.
Challenge 2: Proportionality Issues
- Problem: Maintaining correct proportions, especially when drawing players in perspective, can be challenging. This can result in distorted figures that don’t look natural.
- Solution: Use reference grids or guidelines to help keep proportions accurate. When working on perspective, consider the vanishing points and how objects or figures appear smaller as they recede into the distance. Practicing with basic shapes before moving on to detailed figures can also improve your ability to maintain proper proportions.
Challenge 3: Lighting and Shadows
- Problem: Incorrect lighting and shadow placement can flatten your drawing, making it look less realistic.
- Solution: Study real-life lighting scenarios, paying attention to how light falls on different surfaces and how shadows are cast. Use a consistent light source in your drawings and practice rendering shadows that reflect the form and texture of the objects they fall on. Experiment with different lighting angles to see how they affect the mood and depth of your composition.
Challenge 4: Overworking the Drawing
- Problem: Adding too many details or constantly reworking parts of your drawing can lead to overworked, messy results.
- Solution: Learn to recognize when a piece is finished. Set limits for how much time you spend on certain areas and stick to them. It can also help to take breaks and view your work from a distance or in a mirror to get a fresh perspective. Simplicity can sometimes be more effective than overly detailed work.
Challenge 5: Consistency in Style
- Problem: Maintaining a consistent style throughout the drawing can be difficult, especially when working on complex compositions or when experimenting with different techniques.
- Solution: Practice maintaining a consistent line quality and shading technique across different areas of your drawing. It can be helpful to work on the entire composition gradually rather than finishing one part before moving to another. This approach keeps the overall style uniform and helps you adjust different sections as needed.
Challenge 6: Adding Realism
- Problem: Making the basketball, players, and court look realistic can be tough, especially with textures like fabric or wood.
- Solution: Focus on the textures specific to each element in your drawing. For the basketball, replicate its grainy surface by using stippling techniques or fine cross-hatching. For fabric, observe how light interacts with different materials like jerseys or shoes, and replicate the texture with appropriate shading. For the court, use clean, sharp lines to represent the polished wood surface and add subtle reflections to enhance realism.
By addressing these common challenges with the right techniques and mindset, artists can enhance their basketball drawings and achieve a higher level of detail and realism. Continuous practice and patience are key to overcoming these obstacles and refining your skills.
Conclusion
Bringing the energy and excitement of basketball to life through art requires a blend of technical skill and creative vision. By mastering the essential tools, understanding the fundamentals of movement and proportion, and addressing common challenges, you can create dynamic and realistic basketball drawings that resonate with viewers. Each section of this guide offers practical advice and techniques to help you refine your approach, whether you’re capturing a moment of intense action or telling a compelling story through your work. With practice and dedication, your basketball art can become a powerful expression of the sport’s vibrancy and intensity.
FAQs
1. How can I improve the realism in my basketball drawings?
Focus on accurate proportions, effective use of light and shadow, and attention to detail in textures like fabric and the basketball’s surface. Practice observing real-life scenes and use reference images to refine these skills.
2. What tools are recommended for drawing basketball scenes?
A variety of pencils for sketching, fine liners for inking, and quality paper are essential. Blending tools, such as stumps, can help with shading, and digital tools can enhance or finalize your work.
3. How do I capture motion in my basketball drawings?
Practice gesture drawing to understand the flow of movement. Exaggerating certain aspects of the pose and using techniques like speed lines can also help convey action and dynamism.
4. Why do my basketball players often look out of proportion?
Use guidelines or grids to help maintain proportions, especially when drawing from unusual angles or in perspective. Regular practice with basic shapes can also improve your ability to keep figures balanced.
5. What are some common mistakes to avoid when drawing basketball scenes?
Common issues include overworking the drawing, inconsistent lighting, and incorrect proportions. Focus on planning your composition, using consistent light sources, and knowing when to step back to avoid overcomplicating your work.